my {heart’s} desire valentine giveaway

pinterest-banner-valentine-contest-2013a

I am super excited to be partnered with my dear friend Laurie over at Paper Doll Printing & Design to present a Valentine giveaway! One lucky ducky will win a $50 store credit from three great shops!

It’s my first big giveaway, so bear with me & give me a holler if you see a glitch or have a recommendation. I always love to hear from you!

My heart's design valentine give away.

win $50 store credit from {Jules}

win $50 store credit from Little Girl's Pearls

win $50 worth of store credit at Paper Doll Printing on Etsy.

a Rafflecopter giveaway

my-hearts-desire-contest-facebook-graphic

wordpress-signature

Rosemary Hashbrowns with Sesame Oil

This has long been a favorite recipe in our house.  My hubby has tweaked the recipe over the years to include a few amazing ingredients that never fails to please.  Many a morning our oldest is begging for this delicious bowl of crispiness.

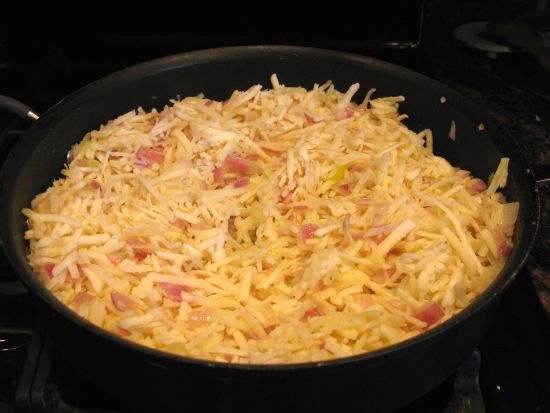
First I melt a full cube of butter while I chop the onions and garlic.  I saute the onions and garlic for a little bit until they’re soft in the butter.  Then I throw in the hashbrowns and mix well.

rosemary-hasbrowns-1

The house already smells amazing at this point.  I’ve in fact been known to just saute garlic and onions right before my hubby gets home, so he can come home to a fabulous smelling house.  Then I figure out what to throw in with it when I get to that point.  But when he is having a hard day, I know he loves to come home to a yummy smelling kitchen.

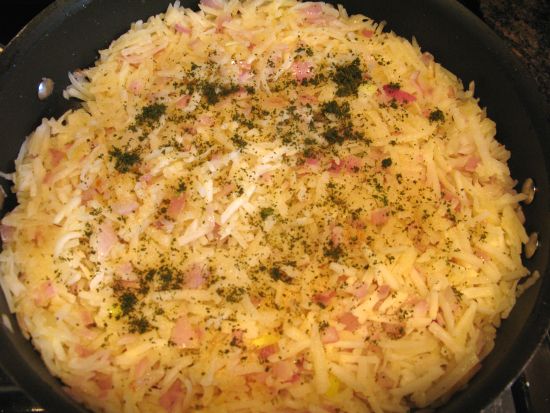
Then because we always forget to dry the rosemary we have in the garden (our bush is about 6 feet tall and 8 feet wide).  So I send the boys out for some harvesting.  I wash the rosemary well and remove the leaves from the stems.  Then I throw them in our handy-dandy magic bullet blender & blend the heck out of them (we all hate rosemary sticks in our food).  However, dried rosemary works just fine, too.

rosemary-hasbrowns

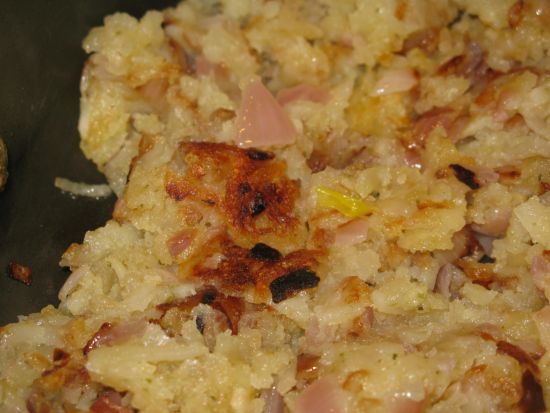
I give it a good stir and add in the sesame oil (our oldest calls this our family secret ingredient).  It makes all the difference!  Trust me.  Put the lid on and let it sit for about 10 minutes (stirring every so often).  Remove the lid and stir again and then here comes the hard part – you have to let it brown.  I am so bad at this.  I want to stir and stir, but it never gets brown.  So over medium heat I set the timer for 2-3 minutes not allowing myself to touch it until the timer goes off.  Then it starts to get lovely crispy bits in it.

crispy-hashbrowns

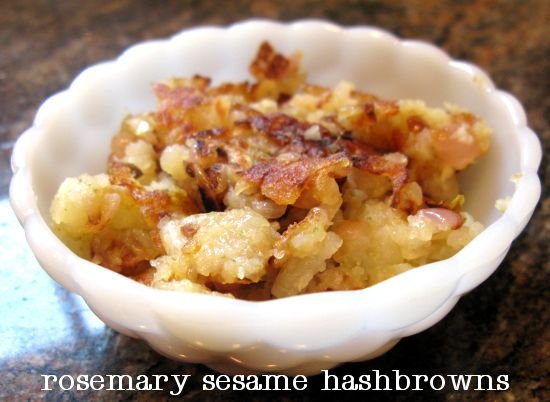
I usually cook my hashbrowns for about 10-20 minutes at this point (well worth the time), stirring every so often. Wait until there are enough crispy bits for you and voila…a wonderful pot of hashbrowns.

Add a touch of salt (if you like) and enjoy.

rosemary-hasbrowns-2

Rosemary Hashbrowns

  • 1 cube of butter
  • 1 small onion, finely chopped
  • 2-5 cloves of garlic, minced (we like a lot of garlic, but you can use whatever amount suits you)
  • 1 Tbs. rosemary
  • 1 bag frozen hashbrowns (do not thaw)
  • 2 Tbs. toasted sesame oil
  • Salt & Pepper to taste

Melt butter over medium heat.  Add garlic and onion – cook for a minute or two to soften everything a bit.  Stir in the rest of the ingredients.  Place cover on pan and cook for 10 minutes, stirring every so often.  Remove lid and allow hashbrowns to brown – stirring about every 2-3 minutes.  Cook for another 10-20 minutes, until you have reached the desired crispiness.  Season with salt & pepper.

wordpress-signature

Coconut Cinnamon Granola

This has become a staple in our household.  We most always have it in a jar in the cupboard.  It is the thing everyone requests for Christmas each year.  So we make giant batches right before Christmas and package it up all cute and sweet in mason jars wrapped with a bow.  I’ve had several requests to share the recipe, so here you go.

  • 1/2 cup honey
  • 1/2 cup brown sugar
  • 1/2 cup oil (we use coconut oil, but other vegetable oil might work as well)
  • 2 Tbs. cinnamon
  • 1 cup coconut shreds, unsweetened (we use Bob’s red mill coconut shreds…YUMM!)
  • 1 Tbs. vanilla extract
  • 6 cups oats (regular old Quaker oats work just fine)

Before you start, preheat your oven to 350 degrees.

Add honey, brown sugar and oil to a large pot and heat on medium until all melty.  Turn off the burner.  Add in the coconut, vanilla and cinnamon.  Stir well.  Stir in the oats.  Stir VERY well…make sure everything is coated nicely and stirred evenly.

Spread mixture evenly in a GREASED 9 x 13 pan.  I use a baking stone, but my sister uses a regular aluminum pan – both work just fine.  Place in the preheated oven.  Cook for 10 minutes.  Turn off the oven, but DO NOT REMOVE the granola.  Just leave it in there.  Don’t even open the door.  Go to bed.  Then in the morning, stir up the granola and enjoy!

A few hints –

  • sometimes my granola gets hard, so I have to use a butter knife to break it up
  • if the granola is not as crunchy as you’d like it, you can pop it back in the oven and cook it for another 10 minutes.  Remove, stir and let cool completely.

wordpress-signature

a blissful shopping sale

I don’t know about you, but we live in a small town, so while we do our best to shop local there are times we need to shop online.  I love supporting small businesses across the country. ♥

I have to tell you, shopping for Christmas gifts in my jammies with my favorite cup of tea is really a blissful shopping experience for me.  No crowds, no checkout lines, no wondering if I’m going to get there and something will be in stock or our of stock.  Phew!  So I wanted to pass on my shopping bliss to you! 🙂

I decided to give you the option to pick YOUR favorite coupon that will work for YOUR shopping list.  I’d love to help put a few baubles under your tree all wrapped up, pretty & pink.

So sit back with your favorite cup of Joe or a nice cuppa tea and peruse at your leisure.  I also didn’t want to rush you, so the sale isn’t just good for an hour or for Black Friday…you have ALL WEEKEND through Monday, November 26th.  I would love to help make your shopping season less stressful.  All orders ship out super quickly as well.  So you’re sure to get them by Christmas.

Happy Shopping!   ♥ Little Girl’s Pearls ♥

ImageFree Pearl Earrings15% off your entire order.$15 off a sweet pearl bracelet.

beautiful baptism jewelry

I am so excited!  My latest photo shoot shots are back.  The amazing Krista Jacobs was the photographer, and she is so good with the wee little ones.  I had her showcase a sweet little pearl baptism bracelet with a dainty sterling silver cross accent charm.  I think the shots she got are just adorable.

Sweet pearl baby baptism bracelet

Sweet Pearl Baptism Bracelet with Dainty Cross

Too cute for words!


Little Girl's Pearls - sweet pearl baptism bracelet

sweet pearl baptism bracelet

Rustic Farm Girl Stamped Necklace

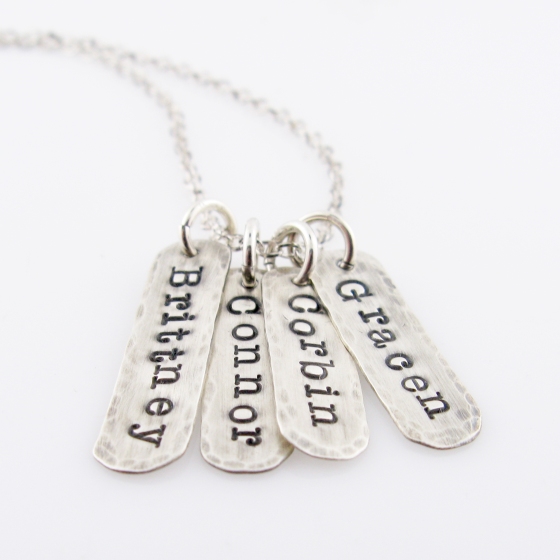
A dear friend of mine requested a special necklace for a birthday gift.  It was for the lovely Jill (she let us use her gorgeous ranch for our photo shoot last year).  She loves more rustic pieces, so I set out to create something to capture her style and show off her kiddos.  I came up with the rustic farm girl necklace.  I just LOVE it!

rustic-farmgirl-stamped-tag-necklace

Rustic Farm Girl Hand-Stamped Necklace

My office storage makeover

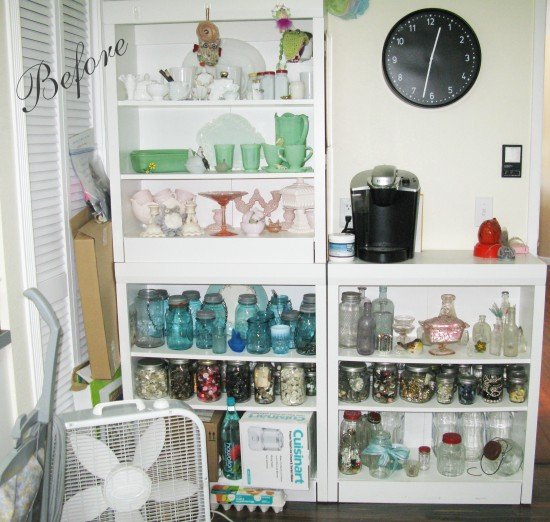
My new pretties!  About 2 years ago we moved me out of the “den” and spiffied up the garage into a lovely office with oodles of great space to create jewelry.  My house is full of boys, so there are no girlie things around.  It was nice to have my own space, and wonderful to have a place to display the white, pink and green vintage milk glass, antique bottles and ball jars that I’ve been collecting over the years.  I had some hand-me-down bookshelves that I was using to show off all of my pretties, but it required constant dusting because of the buffer I use in the garage to polish the jewelry.
office organization

The Before Picture

We talked to a local contractor about having custom cabinets built…ha ha ha…the quote was almost $1,800.  That was completely out of my mental budget, so I just resigned myself to continuing weekly dusting sessions.  The something miraculous happened.  We were visiting family in Sacramento and headed to Ikea just for fun.  There we found the *perfect* kitchen cabinets that you could easily add lighting to to boot!  Perfecto.  And only about 1/3 of the price of custom!   We even found special lighting that would work with this setup  (although we forgot the cord, so the lighting isn’t hooked up yet).

This is what we ended up with, and I’m just overjoyed!  My sweet hubby spent two days putting it all together, and it looks spectacular!
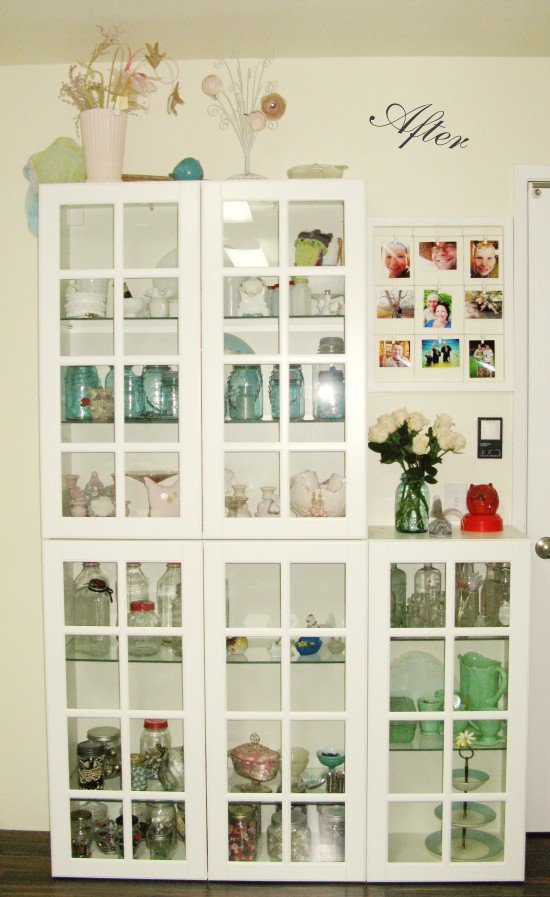
The "after" of my office storage makeover.

We wanted slightly narrower cabinets, so we could open the bi-fold door on the left.  These fit perfectly with only about 1/8″ to spare!  Talk about eeking out every bit of storage space.  The shelves are glass, which makes me happy.  The top cabinet has two LED lights.  The bottom and side cabinets each have one LED light at the top (those will work after we pick up the silly cord!)

One of the super fun things about this project is that I have bits & bobs and odds & ends stored in these pretty little vintage goodies.  One jar is for pink beads, another for white, another for vintage centerpiece pendants.  Yet, you can’t see the clutter!  Splendid. 🙂

Everything has a place.  My white milk glass takes up a shelf:
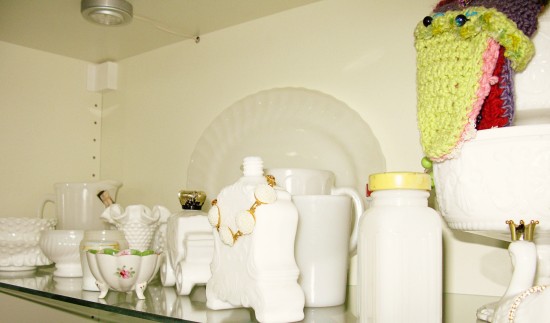
white milk glass

My pink milk glass has it’s own shelf:

my pretty pink milk glass collection *sigh*

My jadeite has its own little shelf:
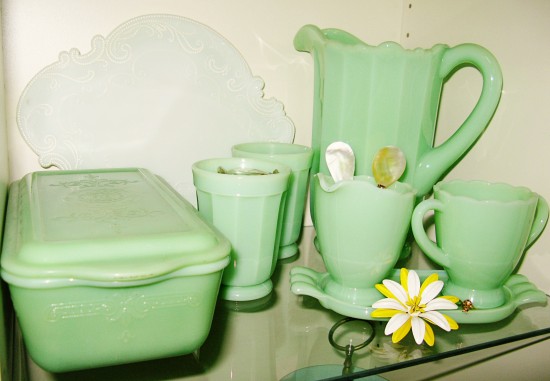
jadeite collection

my little jadeite collection

I love my collection of vintage blue ball jars:
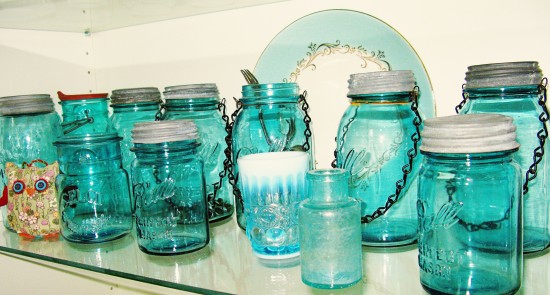
vintage blue ball jars

i just {heart} vintage blue ball jars

I even have a little shelf of my antique jar collection.  Now, they’re all scrunched together on one little shelf, and I may have to change that.  But they will be right under the LED light, and I think they’ll look spectacular!

antique glass bottles

my little antique glass bottle collection

I had a fun little white picture frame that was cross-hatched with wire to hold little pictures with clothes pins.  I had used it for a photo shoot awhile back, and was thrilled to find a new use for it.  Using a picture frame for pictures…imagine that!  No glass, they’re just hanging there and will be easy to change when I have a whim.

picture frame for family pictures

The last little bit was the tiny area I had to leave open so we could use the light switch and garage door opener (as much as it’s my beautiful office, it is still a garage, after all…).  My sweetie brought me some flowers from the farmer’s market, so I stuck them in a blue jar.  The little feather collection is held by a vintage flower frog.  The little orange owl was a garage sale find.   I love that little orange owl!

a little collection of this and that

Here’s my flower frog turned feather collection.  We live near an ostrich farm, so some of the feathers are from there.  The other feathers are gifts from my boys that they find while we’re out on walks.  It think it’s a fun way to display them, and it allows me to see & think of my sweet boys every time I walk by.

my feather collection

The only thing I had to move that I was sad about was my keurig.  I love my coffee maker (it was a Mother’s Day gift).  So it’s been moved to my work station as a temporary home until I can figure out where to put it.  But all in all this has been a wonderful project that makes me smile every time I see it!

This turned out to be a great project that adds visual loveliness to my work space.  I find myself staring at it throughout the day when I get bogged down with email or other such things.  It’s also served as a great inspiration for some new jewelry designs!

What do you love about your office?

Beautiful Pearls and Fabulous Vintage Glass.

Beautiful Pearl Necklace with antique French glass box

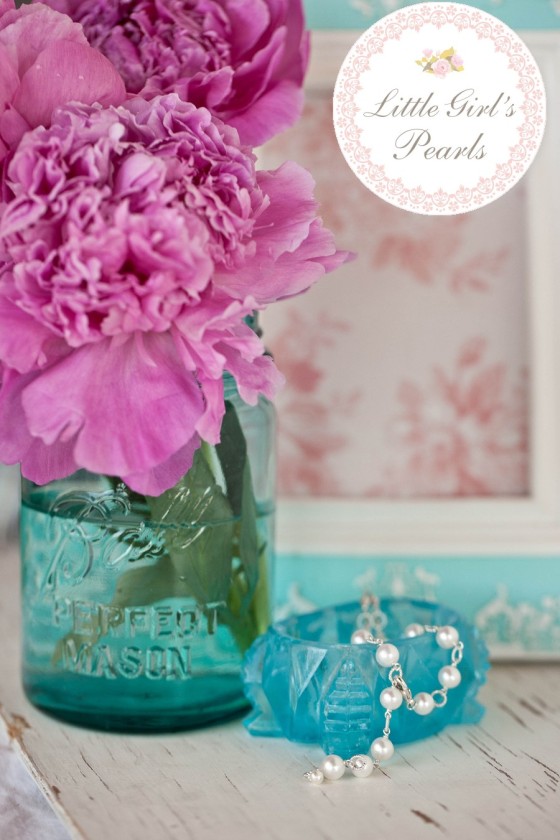
We had such a lovely photo shoot for my Little Girl’s Pearls line.  I am such a sucker for peonies & vintage blue ball jars.  The stylist had a great antique French blue glass box.  I {heart} this photo.  It makes me smile.

Sweet Cream Butter…Yumm!

I decided to try my hand at homemade butter.  I remember shaking the jar and passing it around the classroom when I was a little girl, and shaking the jar with my boys when they were little.  However, I’ve never actually made any significant amount of the creamy stuff.  Today the boys were at gymnastics camp (because we homeschool, when the boys have a “camp” or other activity it becomes a rare mama break).  I took the opportunity of a quiet house to whip up a batch.  To my surprise, it actually ended up being relatively easy and quick!

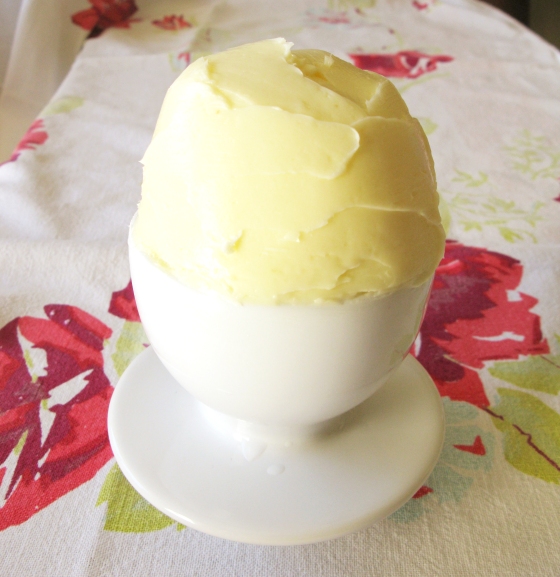
fresh butter

Fresh Made Butter

  • 1 quart of heavy whipping cream
  • 1/8 tsp. salt

I poured the cream into my stand mixer, put the splash guard on (this is a must if you don’t want buttery gorgeousness all over you and your walls), then turned the mixer on high.  I ended up also covering the whole thing with a kitchen towel, to cut down on the splashing.   Every couple of minutes I turned it off and scraped down the sides, but later found out that I don’t think that was necessary.  It took a bit longer than I had anticipated, probably because I kept turning it off to scrape the sides!

I used the whisk attachment until the cream started to stiffen up, like whipped cream.  Then I switched out to the paddle attachment, so I wouldn’t have to dig the butter out of the whisk.  Then I just let it go.  After a few minutes the motor started to slow.  I peeked in and the butter had separated from the buttermilk!  Hooray!

I scooped out the solid butter and squished it into a ball.  I ran it under cold water and kept squishing it/kneading it until the water ran clear.  I read somewhere that you need to do that to get the buttermilk out, or your butter will go bad quickly.  When the water ran clear, I added in the salt and continued to knead it for awhile until it was well combined.

I recently purchased a butter keeper (we saw one at my Mother-in-Law’s and were intrigued).  It keeps the butter fresh as well as soft…perfect for our house of toast eaters.  I swear our boys could eat a loaf of bread a day if we let them!

Homemade Butter

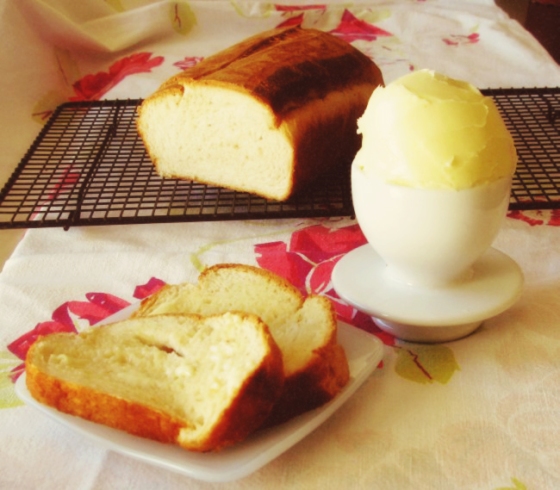
The verdict was that the butter was great (especially since I baked a fresh loaf of bread to go with it).  Smiles all around for homemade bread and fresh butter!

::Kindle Fire Give Away Contest::

Hooray!  Today’s the day.  Now I know it’s April Fool’s Day, but this a great surprise among all of the pranks and gags.  I’ve teamed up with oodles of other great small businesses to give away a few fun prizes.

  • Kindle Fire
  • Kindle Fire Case
  • Amazon Gift Card

Head on over to Kay’s blog at My Precious Kid to enter!

Good luck!! 🙂